INDEX:
In this article, we are going to talk about:
- how the Euro Nymph technique was born
- what are its strengths compared to other fishing techniques
- what specific equipment to buy
- what are the most commonly used rigs
- how to cast and drift effectively
1. ORIGINS AND EVOLUTION
The fishing technique we know today as Euro Nymph originated in Poland in the 1980s, during a fly-fishing championship. Given the Polish team's difficulty in acquiring the correct equipment, they were allowed to participate in the competition without using traditional fly lines. Instead, they used simple nylon lines directly, without making classic casts, but fishing straight under the tip of their rods. The drift of the nymphs was therefore very short but extremely precise and, on that occasion, to the amazement of the participants, the Poles won that championship by far.
The Czechs, who immediately saw the potential of this technique, managed to perfect it to such an extent that they won the world championship in 1986. That was the perfect stage, which introduced the world to what many still call Czech Nymph style fly fishing.
After a period in which the Eastern countries dominated the fly-fishing competitions, the French and Spanish also copied and modified this fishing technique to suit their own needs, renaming it in turn French Nymph and Spanish Nymph.
Soon afterwards, thanks also and above all to the world of competitions, this fishing technique literally spread like wildfire, first in Europe and later also in America. Now there are thousands of enthusiasts all over the world who practise modern nymph fishing and companies have started to produce a huge amount of specific tackle for this type of fishing, from rods to reels and much more.
All this suggests that this is not just a passing fad, but a fishing technique born to stay.
1.1. CZECH NYMPH
The Czech Nymph technique involves the use of a fly line as well as a leader and a tippet which in all is no longer than twice the length of the rod. Having the fly line not hanging beyond the tip guide of the fly rod and a reach defined by the length of the leader it is necessary to get as close as possible to the fishing spot, making short drifts directly under the rod tip, just above the current vein where you think the fish might rest. Once the nymphs have passed this section of water, they are lifted and tipped upstream for a new drift. With this technique, the nymphs have little time to enter the strike zone and therefore rather heavy patterns are used in order to reach the bottom in the shortest possible time/space. One of the advantages of this setup is that it allows the angler to switch from nymph fishing to dry fly fishing extremely quickly, without having to replace the reel, because the fly line is already spooled anyway, and the leader is not excessively long.
1.2. FRENCH NYMPH
In the French Nymph technique, the setting is similar, we always find the fly line, the leader and the tippet, with the difference that the leader is much longer. This allowed the French to fish effectively at greater distances while still leaving the fly line on the reel. Being able to fish further away means making much longer drifts and this brings with it some not inconsiderable advantages. In addition to being able to cover more water, the nymphs are given much more time to sink and therefore do not need to be too heavy. Needless to say, a lighter nymph moves more naturally in the water and is consequently much catchier. In fact, it was not long before the French also made a positive impression in the world of competitive fly fishing.
1.3. SPANISH NYMPH
The Spanish fly anglers were the most radical in customising this fishing technique. If in previous variants the fly line is always spooled on the reel, even if not used, in Spanish Nymphing it is completely removed and replaced by a nylon monofilament. This modification allowed the Spaniards to be able to present their nymphs at considerable distances, managing to be very effective even on rather large rivers. It must be said that with the Spanish Nymph technique it is difficult, if not impossible, to switch from nymph fishing to dry fishing as easily as with the Czech Nymph. In this case, it is necessary to replace the reel, fitting one loaded with the classic fly line.
1.4. THREE TECHNIQUES, ONE NAME
Mono rig nymph fishing, in its most primitive forms, was called by different names according to the nation that practised it and according to the modifications that these nations made to the technique. Coming to the present day, however, we can say that no European state has succeeded in leaving its national imprint on the name of this technique, and today it is universally recognised around the world as Euro Nymph. This term, given to us by the Americans, encapsulates the basic concept that unites all these techniques and makes them so effective. Above all, the world of competitions has helped to take the best of the three techniques by taking them to an extreme level of effectiveness, which is why, inthe article below, I will abandon the original terms and only talk about Euro Nymph. Today talking about Polish Nymph, Czech Nymph, French Nymph and Spanish Nymph is certainly interesting on a cultural level but quite anachronistic on a practical level, which can only lead to confusion for those who are approaching this world for the first time.

2. THE PRACTICAL ADVANTAGES OF EURO NYMPHING
In general fishing, one has always used weights or weighted lures to be able to physically cast one's baits in the desired spot.
In fly fishing, on the contrary, completely weightless lures are used. What generates the energy needed to load the fly rod to cast the lure is the fly line.
Over the years, weighted fly patterns, the so-called nymphs, have also been introduced in fly fishing, but despite this, the fly line has always played a major role in the fishing action.
In classic nymph fishing, however, difficult situations arise, especially for beginners, because the fly line inevitably ends up settling on the water, becoming prey to all the currents and obstacles in the stream. The angler will have to be very skilful in order to avoid the leader and tippet from dredging, mending the line continuously to ensure that the nymphs are not dragged by secondary currents. Obviously, the further out you fish, the more this problem is amplified, because you will have larger portions of the fly line resting on the water to deal with.
Euro Nymphing has removed this problem at its base, essentially eliminating the traditional fly line and replacing it with monofilament lines or ultra-light 0.55mm fly lines. The mono line, being much lighter than the fly line, stays out of the water and is not disturbed by obstacles or secondary currents.
This has reduced the problem of dredging almost to zero, totally eliminating the need for mending to maintain contact with the nymphs. This provides much simpler and more precise drift control and makes it easier to fish on complex currents.
Another advantage of the Euronymph is that slack fly line, mono line, leader or tippet no longer exist and the contact between the angler and the nymphs is direct. This allows you to perceive what is happening underwater at all times, making you ready for every take with lightning-fast strikes. In classic nymph fishing, no matter how experienced an angler may be, this is not physically possible.
The main advantages of Euro Nymphing are:
- minimal dredging
- no mending required to control the drift
- instantaneous perception of the takes and super-fast strikes
- direct contact with the nymphs, with no line slack between you and the nymphs
In the very simplified pictures below you can get a rough idea of the influence the weight of a classic fly line has compared to a monofilament line or an ultra-light fly line.
The Euro Nymph has renounced the use of the traditional fly line, effectively bringing nymph fishing to greater precision, greater sensitivity and better perception of takes.
3. EURO NYMPH TACKLE
With the spread of the Euro Nymph technique around the world, companies have been innovative to make very specific tackle and equipment for this fishing technique. In this chapter we will try to look at everything you need and why.

3.1. THE EURO NYMPHING ROD
The fly rods are certainly the first to have been modified to better suit the Euro Nymph. There are three aspects that characterise them and make them particularly suitable for this technique: length, action and weight.
3.1.1. LENGTH OF THE EURO NYMPHING ROD
Although it is also possible to fish at considerable distances in Euro Nymph fishing, maximum effectiveness is achieved by approaching the hot-spot and then fishing as far as possible straight under the rod tip. For this reason, Euro Nymphing rods are longer than classic fly rods and range from 9'6" to 12'. As is often the case, the truth lies in the middle, and the most popular sizes used in this type of fishing range from 10' to 11'. The 9'6" rods are used in small and shallow environments, while to hold a 12' rod all day long without getting your trapezius muscles locked up you have to be some kind of rambo. Their length also plays a very important role in helping you to lift the mono or ultra-light line immediately after casting, thus preventing the leader and the tippet from becoming prey to secondary currents that would dredge your nymphs.
3.1.2. ACTION OF A EURO NYMPHING ROD
The action of Euro Nymphing rods is also specifically designed for this type of fishing. To be clear, every year each manufacturer develops new models with more and more performance, with innovative materials that then influence the actual action of the rod. If you will indulge me in a simplification, however, let's say that almost all Euro Nymphing rods share the same principles regarding 'action'.
Generally speaking, these rods are equipped with a very soft and sensitive tip section, which allows you to perfectly perceive all the roughness of the river bottom, but above all, it allows you to feel the takes of the fish in an instant, giving you the possibility of making precise and lightning-fast strike.
A soft tip is also needed to be able to cast even very light nymphs to decent distances, because it only needs a little weight to load up. In addition, its softness will help to preserve thin tippets from breaking in the case of fights with big and strong fish.
The remaining rod sections generally offer a fair reserve of power, so that even large fish can be handled with confidence. The action in the lower part of the rod tends to be fast to moderate.
3.1.3. THE WEIGHT OF THE EURO NYMPHING ROD
Fishing Euro Nymph style forces you to spend a lot of time with your arm raised and outstretched, supporting rod and reel for several hours at a time. In the long run, this pose will almost certainly generate pain and inflammation of the trapezius muscle that could affect your fishing day. In order to keep these aches and pains as low as possible, sooner or late you will turn your attention to medium/high-end products. A rod made of quality carbon will be more expensive but also much lighter, paying you back with interest during your long fishing days. In this sense, companies are constantly looking for new technologies to be able to make lighter and lighter but at the same time robust Euro Nymphing rods.
As we mentioned earlier, length also affects weight, so don't exaggerate with rod length. There is not much point in being hypothetically more effective in fishing if your back hurts too much to hold the rod up.
Having a reel properly balanced with the weight of the rod can help in this regard. To have a good balance, the reel should have enough weight to balance the rod using the centre of the handle as a vertex. Rather, it is better if the weights are slightly unbalanced towards the handle of the rod rather than towards the tip.
A longer length, a sensitive tip, a good power reserve and above all lightness. These are the main characteristics of modern Euro Nymphing rods.
3.1.4. A SPECIFIC OR VERSATILE ROD?
Before you buy your first Euro Nymphing rod, you need to understand what your intentions are, i.e., do you want to fish solely Euro Nymph style, or do you want to switch from modern nymph fishing to dry fly fishing quickly and effectively? Your answer to this question will be decisive in choosing the type of rod and accessories you need.
3.1.5. A SPECIFIC EURO NYMPHING ROD
If your intention is to fish Euro Nymph at all costs also on raising fish, then the minimum rod length to use is 10'. Obviously, depending on the size of the streams you generally tackle, you can think about turning your attention to longer models, although I would never exceed 11'6", in fact, no matter how big the river may be, you can easily get very good results by limiting yourself to an 11', maximum 11'3".
Always remember, a longer rod is also heavier and therefore more difficult to hold up for a long period of time in the typical Euro Nymph position.
As far as power is concerned, rods ranging from #2 to #4 are generally used. If you are just starting out, I would advise you to go for a #2/3, maximum #3, then as time goes by and your experience grows you can go for different powers, depending on your tastes and needs.
3.1.6. A VERSATILE EURO NYMPHING ROD
If you have decided that you want to change easily from from Euro Nymph to dry fly fishing, or if you simply want to be able to fish some days with one technique and some days with the other without having to buy two rods, you should go for lengths ranging from 9'6" to 10'.
If you mainly fish in small to medium-sized environments, the 9'6" is perfect, while if you often tackle medium to large environments you will definitely be better off with the 10'.
These are the two sizes that allow you to be versatile and effective on both fishing techniques. Again, I advise you to stick to line classes ranging from #2/3 to #3.
To quickly switch from Euro Nymph to dry fly fishing you have three options:
- Replace the reel: in this case you will switch from a specific setting for the Euro Nymph to a specific setting for dry fly fishing. Changing the reel will take you a few minutes.
- Changing the leader: in this case you will have the fly line spooled onto the reel, to which you will attach a 10/15-metre-long leader for Euro Nymph style fishing. To switch to dry fly fishing, you will need to disconnect and wind the 10/15 metre leader onto a spool of foam to replace it with a conical dry fly leader. This operation also takes a few minutes.
- Czech nymph fishing: Czech nymph fishing allows you to be very quick in switching from one technique to the other, as you will be fishing with an essentially identical set-up between the two techniques, i.e., a fly line connected to a relatively short leader. What you will have to do is simply replace the nymphs with dry flies. Remember, however, that when fishing Czech Nymph style you will be quite limited in your nymph fishing, because using a short leader you will necessarily have to get very close to the fishing spot and this will not always be possible.
The ideal rod to start fishing with Nymph is the 10' #3. With this size you can fish effectively Euro Nymph style, but at the same time, and with the right setting, you can switch effectively from nymphing to dry fly fishing. The power not exceeding #3 allows you to make the most of ultra-light 0.55mm fly lines.
3.2. THE EURO NYMPH FLY REEL
I am not saying that the fly reel in Euro Nymph style fly fishing is almost irrelevant because that would be a lie, but if you are a beginner, you can easily use any reel you already have at home, and it will do just fine. Obviously, if you have a pike fly reel for line classes #8/9 it might be a bit of a stretch, but anyway you could still use it. This will allow you to approach Euro Nymphing without spending too much money at the beginning, and then calmly decide whether you like this way of fishing or not.
Having said that, nowadays there are specific Euro Nymph reels on the market with really interesting features that can help you fish very effectively. In the following paragraphs we will evaluate the various options, discovering their merits and drawbacks.
3.2.1. SPECIFIC REEL FOR EURO NYMPHING
If you are only interested in fishing Euro Nymph style and you need to buy a new reel, there is something quite important to know before making the purchase.
If you have ever taken a fly reel apart, you will certainly have noticed that it consists of a frame and a spool.
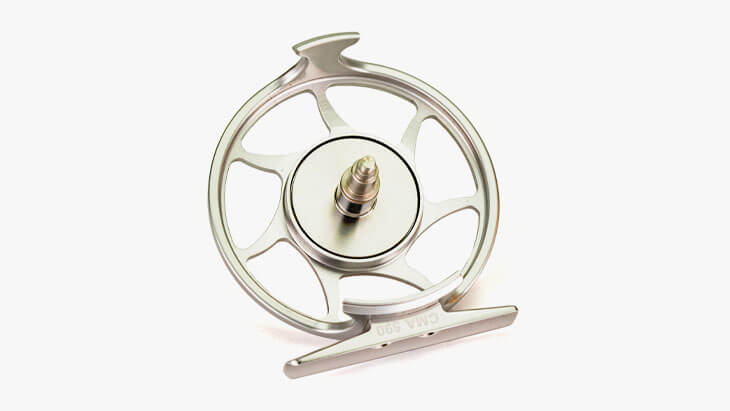
Classic reel frames are designed for fly lines and not for mono lines. This way as the mono line is thinner than the fly line, during fishing it is likely that the mono line tends to get caught between the spool and the frame. If this happens, and there is a good chance that it does, within a few windings you will end up with a line mess on the reel axis. This problem is reduced if instead of a mono line you use an ultra-lightweight Euro Nymph fly line, although in some reels I have seen 0.55mm fly lines anyway jump the spool with the same affection as mono.
To eliminate this problem at the root, fly reels with a closed frame have been created. This sort of cage physically prevents the monofilament line or fly line from creeping between the spool and the reel frame. This way you are safe from sudden line tangles during the fishing action.
An interesting feature common to most Euro Nymph reels is the internal diameter of the spool. Having to hold only 15 to 20 metres of line or at most 28m of ultra-thin line, there is no need for much line capacity. It was therefore possible to increase this diameter considerably in order to be able to significantly reduce the memory effect on the mono line or fly line.
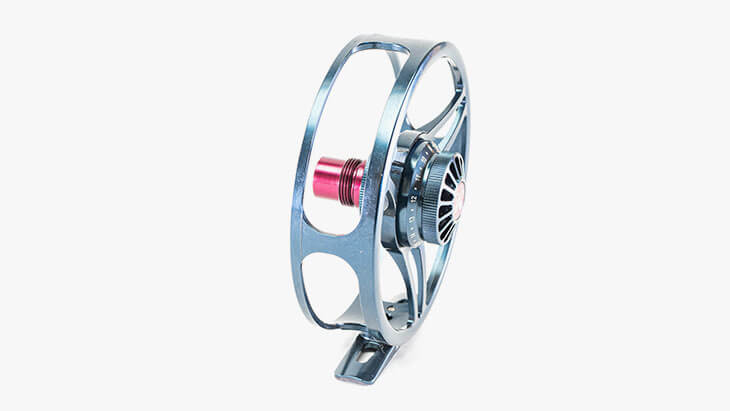
3.2.2. SEMI-AUTOMATIC FLY REELS
As far as semi-automatic fly reels are concerned, although there are some specifically designed for Euro Nymphing, you can be quite safe with any of them because they almost always have a closed frame. Also, in most cases, their spool is large enough to accommodate at least a #3 fly line, which allows you to be very versatile.
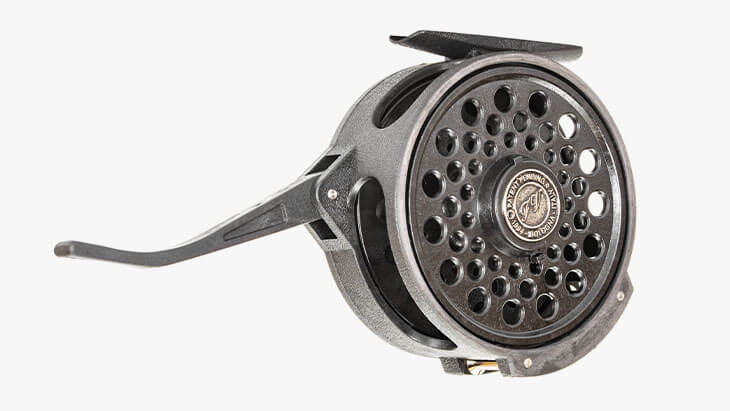
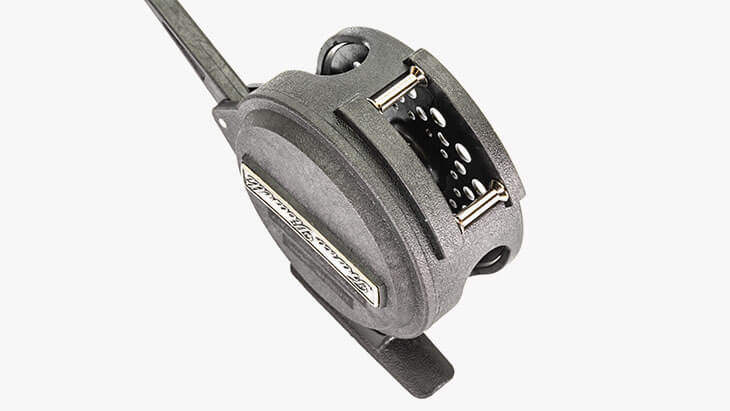
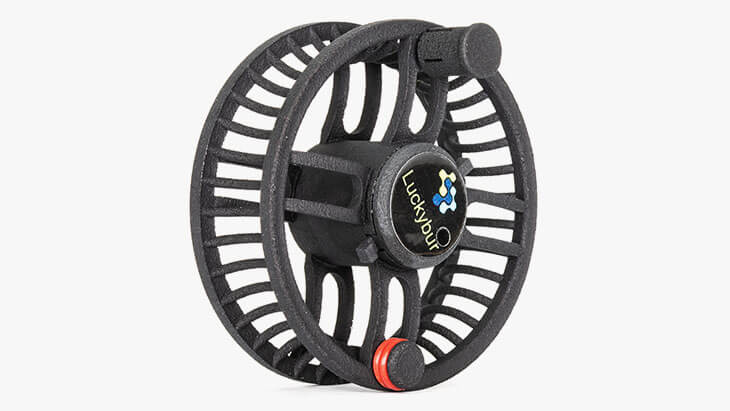
The Spaniards make extensive use of this type of reel in their 'pesca al hilo' and are particularly fond of the classic Vivarelli. The Spanish company Luckybur has even marketed 2 spools, the REINFORCED NYMPH and the COMPETITION, made entirely with a 3D printer and specifically for mono line fly fishing. Both are perfectly compatible with Vivarelli reels.

To be fair, it must be said that semi-automatic fly reels are not for everyone. There are those who hate them and there are those who can't do without them, again the choice is subjective, but if you are a beginner, I would advise you to go for a fly reel where you retrieve manually.
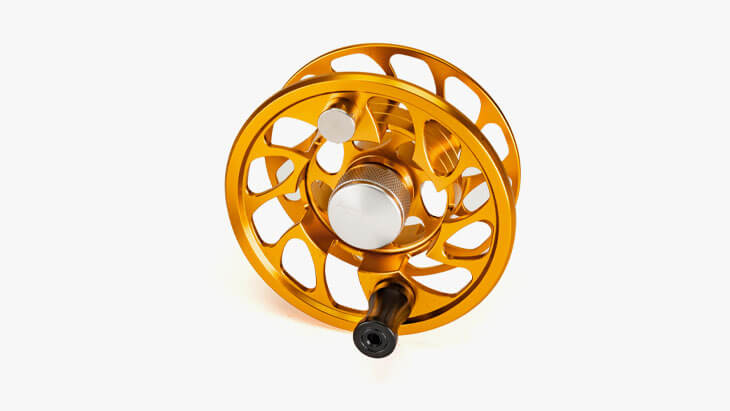
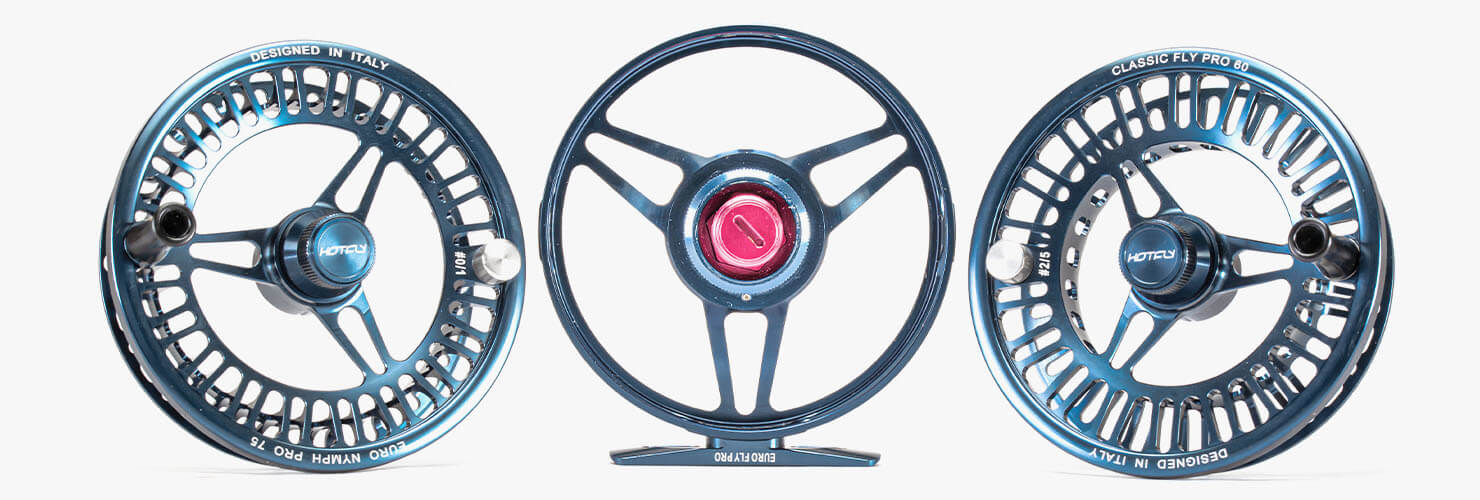
3.2.3. FLY REEL WITH TWO DIFFERENT SPOOLS
There are also very clever solutions, such as the Euro Fly Pro reel, which was created as a specific reel for Euro Nymphing but with its special frame is able to accommodate two different spools. In fact, you can mount either the Euro Nymph spool or the dry fly-fishing spool on the same frame. Combining this type of reel with a 9'6 or 10' rod makes you very versatile and extremely effective in both Euro Nymphing and dry fly fishing.
Discover all the interesting features of the Euro Fly Pro reel!
3.2.4. CONVENTIONAL FLY REELS, DO THEY MAKE SENSE?
Euro Nymph-specific fly reels, due to their small line capacity, often do not allow you to fit a class #3 fly line. Consequently, if you have decided to fish with a classic fly line and simply want to replace the various leaders in order to change the technique, you must of necessity purchase a traditional reel or a semi-automatic reel.
The most important aspect to consider when buying a reel for Euro Nymphing is the frame. Choose one with a closed frame, especially if you only fish with line.
3.3. WADING EQUIPMENT AND MORE
When fishing Euro Nymph style, there is a range of equipment that is indispensable for proper fishing action, and it is almost unthinkable to do without. Specifically, they are:
- Waterproof and breathable waders
- Studded wading boots with rubber or felt soles
- Wading staff
- Fly fishing net
- Polarised sunglasses
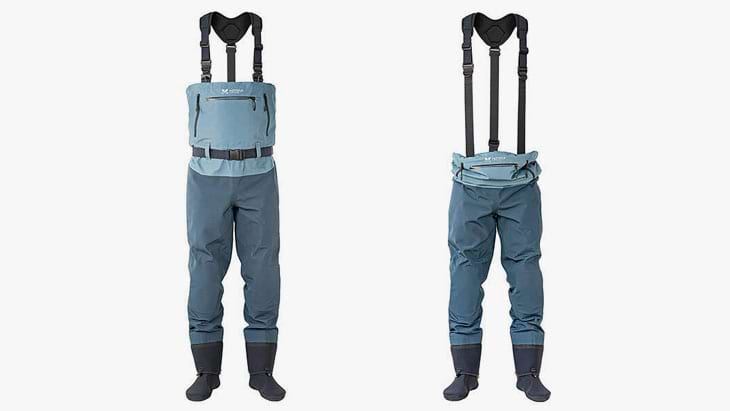
3.3.1. WATERPROOF AND BREATHABLE WADERS
When Euro Nymphing, you will often have to enter the water to fish effectively on the desired spot. To be able to do this as safely and comfortably as possible, you will necessarily need breathable waders.
With breathable waders you will stay dry, because they are obviously waterproof, but at the same time their breathability will allow the moisture produced by the body to escape and prevent condensation from forming inside the waders.
There are hip waders, waist waders and chest waders, but the ones most used by those practising this technique are the chest waders because they allow you to wade deep and reach the best fishing spots. In addition, chest waders also offer an excellent barrier against cold wind.

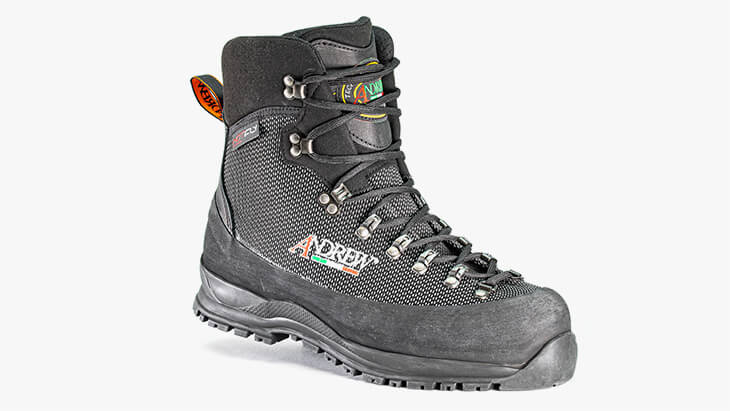
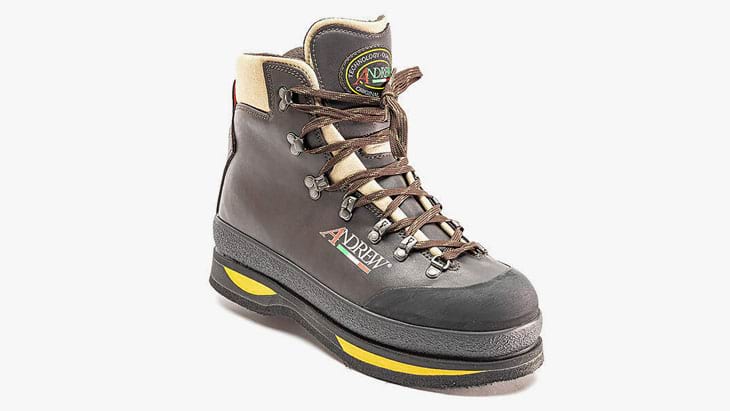
3.3.2. WADING BOOTS
Wading boots with rubber or felt soles plus spikes give you maximum grip on any surface, even the slipperiest. Needless to say, this is crucial for your safety, as falling on the river could also be extremely dangerous.
In our online fly-fishing shop, we have top-quality wading boots Made in Italy, suitable for even the roughest terrain, and their robustness guarantees you excellent durability over the long term.
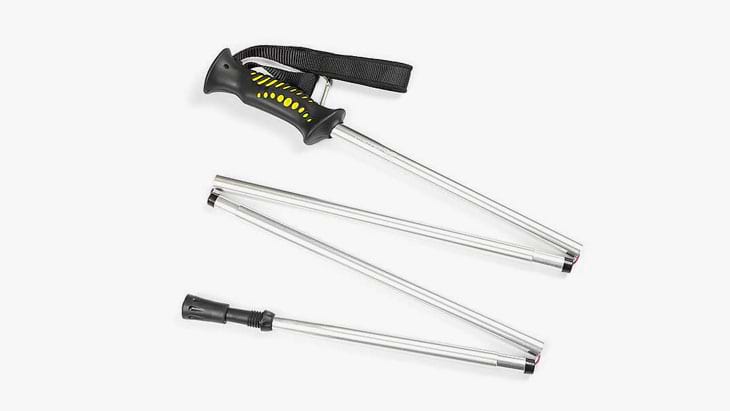
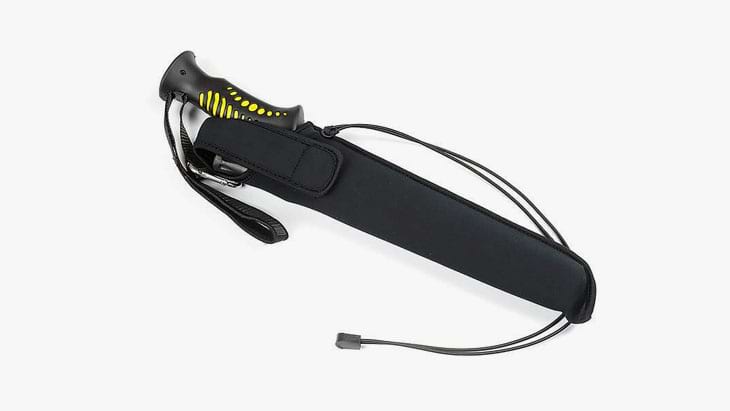
3.3.3. WADING STAFF
Another useful accessory is the wading staff. Especially if you have to cross fast currents or deep runner, having a third support can really help you keep your balance.
The wading staffs are foldable and open very easily when needed, allowing you to use it only when you need it, without it becoming a hassle to carry it with you.
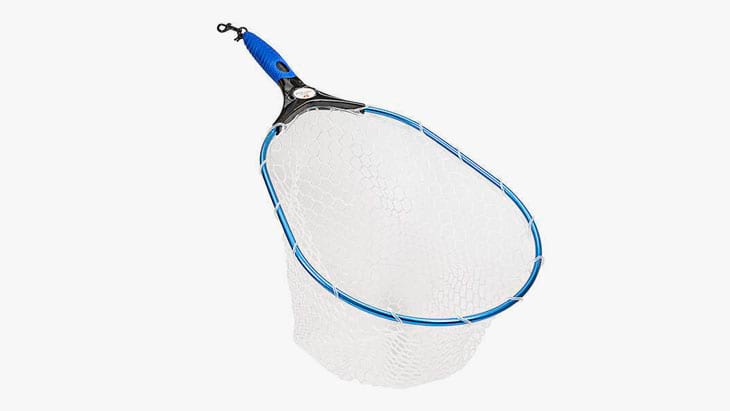
3.3.4. FLY FISHING NET
A fly-fishing net is essential for several reasons, first and foremost the safety of the fish. With the help of a wading net, you can unhook and release the fish in the shortest possible time without even having to touch it with your hands, and all the operations to release it are done with complete peace of mind and safety.
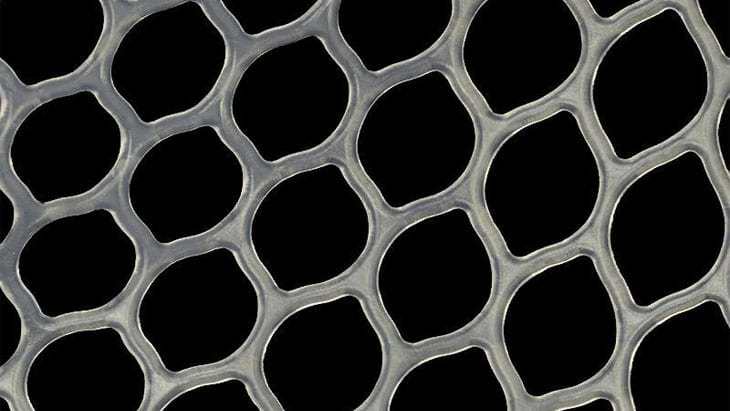
A net made of soft rubber does not spoil the sensitive skin of the fish by removing the protective mucus, and it also dries quickly and does not release unpleasant odours. Another advantage over fabric nets is that your flies will not get tangled, and it will be easier and quicker to resume fishing after you have released the fish.
If you practice catch and release a rubber net is practically obligatory.
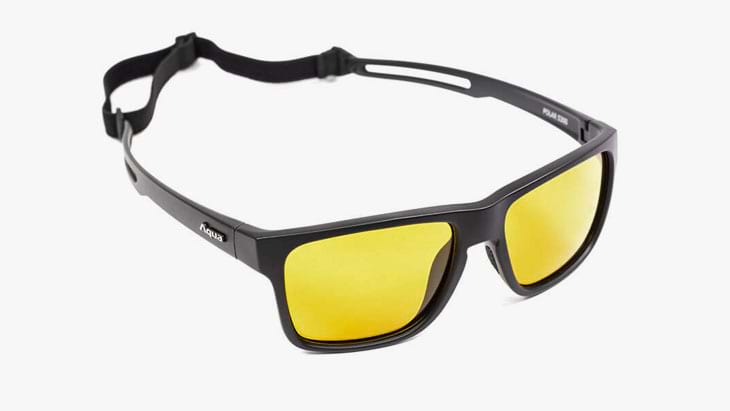
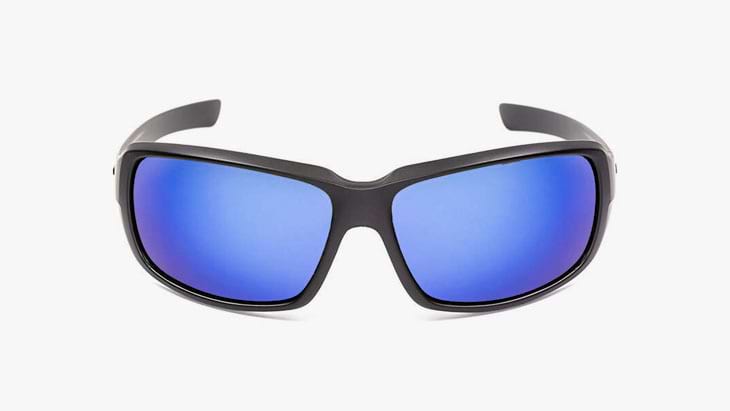
3.3.5. POLARISED SUNGLASSES
Polarised sunglasses are often underestimated in fishing but are an almost indispensable accessory. In addition to prevent your eyes form being strained, they protect them from the sun's harmful UV rays, which should not be underestimated if you do a lot of fishing because in the long run you could have retinal problems.
Health aside, the real advantage they give during the fishing action is that they allow you to see the bottom of the stream clearly, because thanks to polarisation, the annoying glare of light created on the surface of the water is eliminated. This brings with it two advantages, the first is that you will be able to spot any fish easily, and the second, much more important, is that you will see clearly where you are standing, thus increasing your safety.
4. COMPLETE RIG FOR EURO NYMPHING
Starting at the end of the reel, a complete Euro Nymphing rig consists of:
- Backing
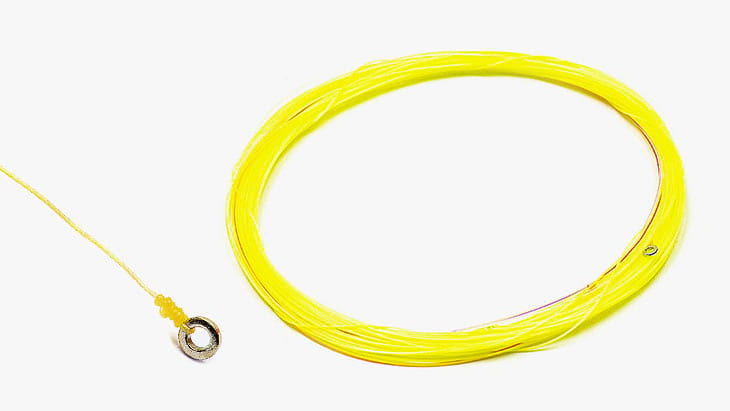
- Monofilament line or ultra-light fly line
- Sighter
- Tippet
- Flies
You will not find the term 'leader' in this list because if you fish with an ultra-light fly line, you do not need it, whereas if you fish with monofilament instead, the mono line itself acts as the leader.
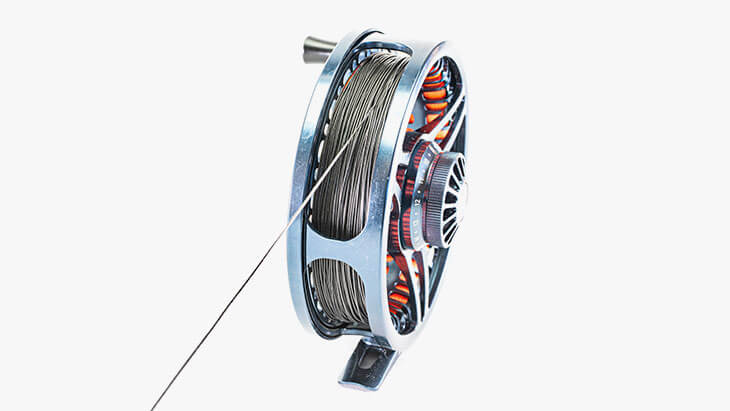
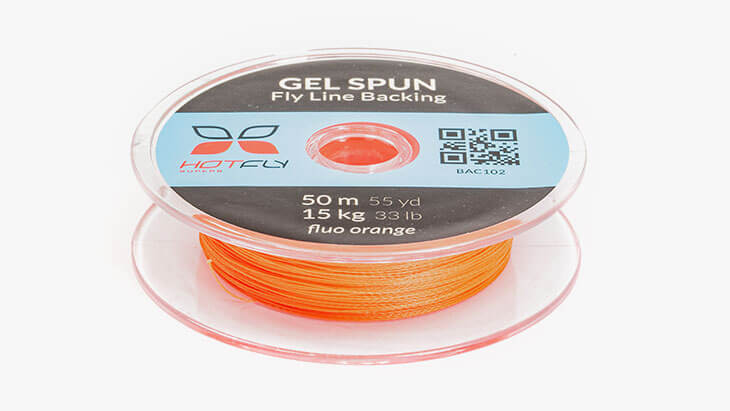
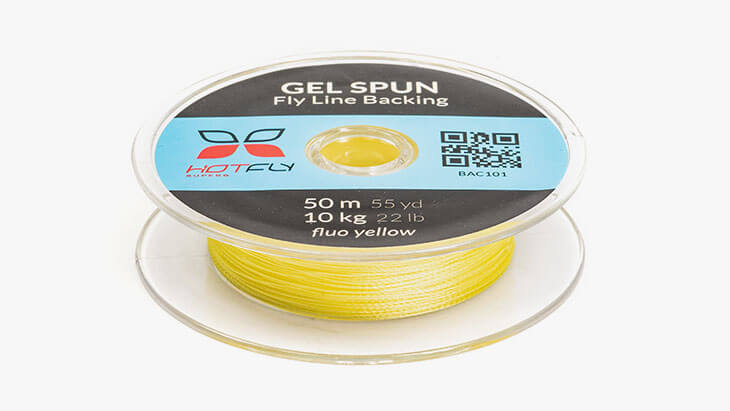
4.1. BACKING
The backing in Euro Nymphing is not really for having an extra supply of line in case of need, it is highly unlikely that you will need it during a fishing session. Its role is more that of a filler, in order to be able to increase the internal diameter of the spool as much as possible and go on to significantly reduce the memory effect on the mono line or fly line. Remember that monofilament, even if of high quality, particularly suffers from this problem, especially at low temperatures. Fishing with mono line that has accumulated memory deprives you of the direct contact with the nymphs that you should always have. This problem is, however, easily solved by stretching the line before you start fishing, either by hand or with the aid of a leader straightener.
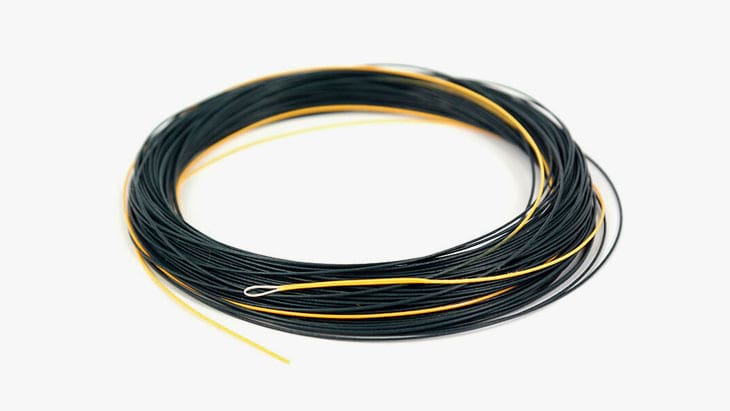
4.2. MONOFILAMENT OR EURO NYMPH FLY LINE
Let's start with a basic concept, the strength of Euro Nymphing lies in the lightness of the line, which allows you to keep it out of the water even when fishing at longer distances with only the tippet being submerged. In this way you will have more control over the drift without having to do any mending, reduce dredging to a minimum and be more precise and effective.
Anything that weighs down this system is not congenial for Euro Nymph style fishing and even as Euro Nymphing fly lines are ultra-light, they still always weigh more than a mono line. At short distances the difference is minimal but over longer distances the weight difference between fly line and mono line is much more noticeable and staying lighter can make all the difference.
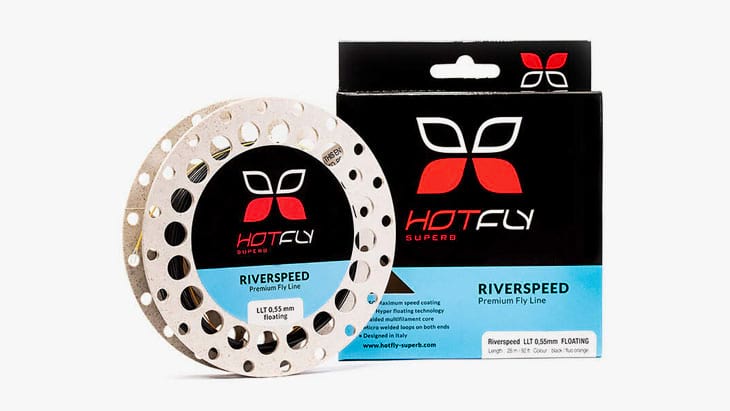
These special 0.55mm fly lines were basically created to circumvent the fly-fishing competition regulations that oblige participants to compete with a fly line rigged on their fly reel. In competitions, fishing with mono line alone is prohibited and the use of a leader no longer than twice the length of the rod is permitted. The minimum diameter allowed by the regulations for the fly line is 0.55mm, the same and universal size found on the market when it comes to Euro Nymph fly lines, and of course everyone uses that one because it is the lightest option you can use.
It must be admitted, however, that these fly lines are really very light and although they logically weigh more than the mono line, it is possible to keep them out of the water very well when leaving your nymphs to drift. They also offer the angler advantages that monofilament can never give, and it is up to you to decide what suits your fishing style best.
4.2.1. EURO NYMPH FLY LINES, ALL THE ADVANTAGES
Although very light, the greater weight of a fly line for Euro Nymphing compared to mono line helps you to load the rod at least a little when casting. This allows you to fish at a certain distance even with very small nymphs or emergers, because you will not have to rely solely on the weight of the flies to load the rod. You can also cast dry flies with good results. If the occasion calls for it and you want to take advantage of that half-hour of raising fish that suddenly appear when you least expected it, you might have a few more chances that a weightless mono line just couldn't give you. Granted, dry fly fishing with an 11' rod and a 0.55mm tail is like trying to get a baseball strike by throwing a ping pong ball, but with the right skills and a soft enough rod you can get over 15 m with no problem.
A rod that loads more also means faster casts that cut through the air better, resulting in increased accuracy, even in a bit of wind. Furthermore, this increased accuracy is very convenient especially when you have to place your nymphs in tight spaces, such as under overhanging vegetation on the bank or near an obstacle.
Another aspect to take into account when choosing between a fly line and a line is rain. When the rod blank gets wet, it creates a sort of adhesion effect with the mono line tending to stick to it, preventing its natural sliding between the running guides. This problem occurs not only in heavy rain but also in damp situations where a sort of condensation is created on the rod. This problem does not occur with the fly line, which will continue to slide perfectly in all weather conditions.
The ultra-light fly line also has the advantage of having a much smaller memory effect than mono lines. Particularly when it is very cold, even if the monofilament is of high quality, it will tend to form spirals which, if not stretched out, will spoil the fishing action quite a bit. The fly line suffers much less from this problem.
4.2.2. SO, WHAT TO CHOOSE?
There are different schools of thought on the subject and there is no absolute answer that justifies buying mono line over a fly line or vice versa. I think you should weigh up the pros and cons and then choose according to your needs. In my opinion, if you don't care about versatility but only want to fish Euro Nymph style with maximum efficiency, the mono line is the best choice, while if you prefer to be more versatile in order to be able to cope better with different situations, the ultra-light fly line gives you that extra help you were looking for.
4.3. SIGHTER
In Euro Nymphing, a sighter performs 5 fundamental tasks and is one of the most important elements of the whole set-up. Thanks to it you will be able to:
- understand where your line is
- understand the exact moment when the nymphs start to work
- know what depth you are fishing at
- understand the speed of your line in relation to the current
- sense a take even before you feel it with your rod
Being able to get all this information is crucial in Euro Nymphing and you can get it simply by reading the behaviour of the sighter.
There are many types of sighters on the market, each with its own merits and shortcomings, but all very good. The ones to be discarded at the outset are all those bulky indicator types, from synthetic fibre tufts to coloured foam balls. In other words, almost all strike indicators used in classic nymph fishing are to be avoided, because anything that can offer resistance to air and water or that in any case has a certain weight, even if minimal, can compromise the correct drift of the nymphs.

There are 4 sighter types most suitable for Euro Nymphing and all of them consist of a simple line attached in-line with the rest of the set-up.
The length of the sighter varies from 20 to 50 cm and must be tied to the leader through a blood knot. The side of the sighter that is to be connected to the tippet would ideally be equipped with a micro-ring, which would allow you to quickly replace the tippet itself without having to cut off portions of the sighter each time. Moreover, when your nymphs get snagged on the bottom and you have to tear the leader off, the breaking point will always, or almost always, be at the micro-ring. This is provided that the tippet has a breaking strength lower than that of the sighter, which would be advisable.
There are cases in which fly lines with incorporated sighters or fluorescent-coloured leaders are used. In these situations, you do not necessarily need to fit an additional sighter as it is already present.
As already mentioned, the key to success in this fishing technique is simplicity, lightness and minimalism, and the most suitable sighters in this respect are bicolour or tricolour line, czech drop, microspiral or appropriate sighter waxes.
4.3.1. MULTI-COLOURED MONO LINE
The bicolour or tricolour line is simple, light and visible. The complementary colour combinations of fluorescent shades allow you to see it in all light conditions with ease and it does not affect the drift of nymphs in any way. It is generally sold in 25-50 m spools.


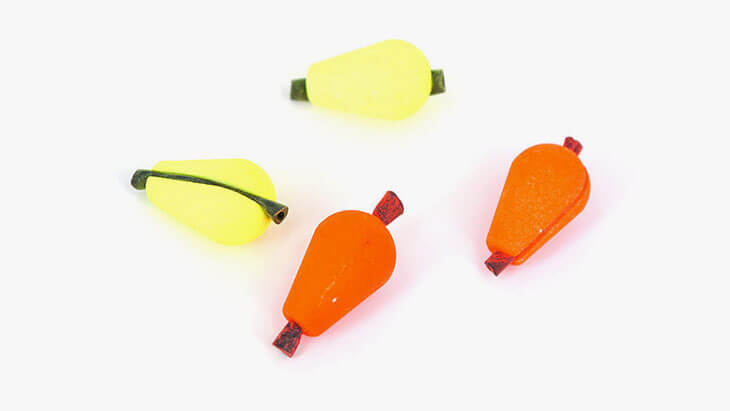
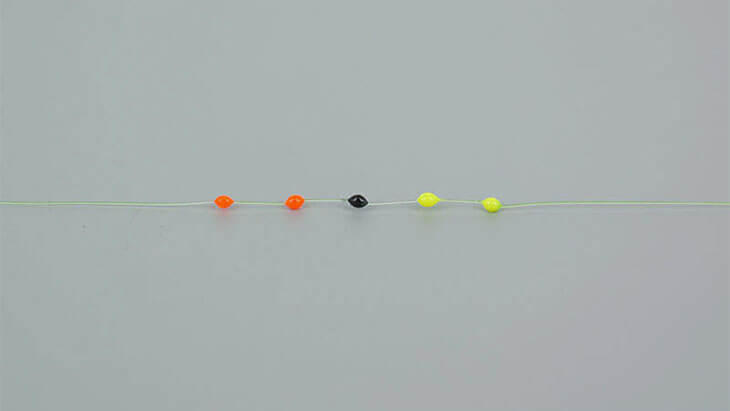
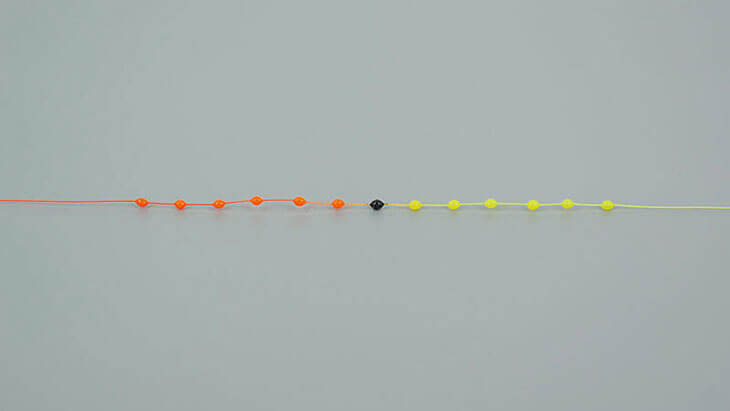
4.3.2. CZECH DROP
The czech drop is a piece of line equipped with small, coloured drops made of hard resin. They are placed evenly along the line, which can be either transparent or coloured itself. These drops greatly increase visibility but can be a problem if they have to pass back and forth from the rod tip frequently.
4.3.3. MICROSPIRAL
The microspiral is made of twisted two-colour mono line that forms a kind of spring. This type of indicator was originally invented to circumvent fishing competition rules that prohibited the use of the classic buoyant strike indicators. In fact, with the microspiral, nothing was added to the leader, but the leader itself became a strike indicator and was used for fishing at long distances, placing it on the water surface just as is done in classic nymph fishing with a fly line. Since it is impossible to mend mono lines in order to control the drift, the only situation in which its use was functional was in long flat-water runners with low currents. The 'spring' worked like any other strike indicator but due to its shape did not present any resistance making it perfect even for very shy fish. Its use above the water surface, like the other Euronymph sighter variants, is possible although it is not of much use because that is not the purpose for which it was designed.
4.3.4. COLOURED SIGHTER WAXES
Coloured sighter waxes can be applied directly to the line, whether transparent or coloured. Their strength is their versatility, as they can be put on and taken off quickly. In this way you can adjust the height of the sighter from time to time without having to redo your rig.
4.4. THE EURO NYMPH TIPPET
In Euro Nymph style fly fishing the tippet is connected to the sighter via the micro-ring already mentioned above and can be made so that 1 or 2 nymphs can be tied to it, depending on fishing regulations and your needs. The knot that is most commonly used to make the dropper for the second nymph is definitely the surgeon's knot, which is easy to make and very strong.
The length of the tippet depends on the depth of the water column in which you are fishing. Before you start fishing, you should assume the average depth you think you will face most often during the day's fishing and base your measurement on that. Then you can make all the changes you think are best, just remember that there is always time to cut back, it is better to start long and shorten later.
On a hypothetical water column of 100 cm, the tippet should be about x1.3 times as long as the total depth, i.e. 130 cm. This is because the current within the water column will tend to bend the tippet. The extra length serves to compensate for the loss of length due to this curvature and thus have the sighter 5-10 cm above the water surface and the nymphs on the bottom. Conversely, you would be forced to submerge the sighter to let the nymphs reach the bottom, effectively losing sight of it without being able to exploit its many advantages. Rather it would be better to increase this length, even up to x1.5, to ensure that the sighter always stays out of the water.
A tippet with a small diameter has less resistance in the water and allows your nymphs to sink faster. Typical tippet sizes in Euro Nymphing are ranging from 0.12 mm to 0.14 mm. Don't worry about the small sizes, the soft tip of your Euro Nymphing rod reliably prevents line breakage even with larger fish.
The length of the dropper varies from 7 to 15 cm. Again, an ample dropper length gives you the possibility of being able to change more often nymphs without shortening it too much. If the dropper gets too short, you will have to re-tie the knot, so leaving yourself some leeway is definitely a good idea.
The distance between the dropper nymph and the point nymph varies depending on the type of effect you want to achieve on the drift and the sinking speed of the nymphs themselves. However, we can say that a good starting setting is to place them at a distance of between 30 and 50 cm. As mentioned, this distance can change considerably during fishing depending on the needs of the moment.
It is certainly more suitable to use fluorocarbon than nylon when building the tippet for Euro Nymphing, because it has 4 characteristics that make it perfect for this purpose, namely: greater resistance to abrasion, greater breaking strength at the knots, a low degree of light refraction and faster sinking.
- Abrasion resistance is much higher than with nylon and in this type of fishing it happens very often that the line rubs against rocks and various obstacles. Having a stronger line can make a real difference.
- The breaking load on knots is also better than with nylon, provided they are tied neatly. This factor is definitely an extra ally to have by your side, especially when handling large fish.
- Another advantage to be taken into account is the low degree of light refraction. Many claim that fluorocarbon, because of this characteristic, is invisible in the water. I would not go so far as to make such claims, but it is certainly much less visible than nylon. The latter, reflecting more light, could in fact spook the shyer and more suspicious fish.
- Having a higher density, it also has a higher sink rate, and this helps your nymphs to reach the river bottom faster.
4.4.1. AN EASY EURONYMPH TIPPET
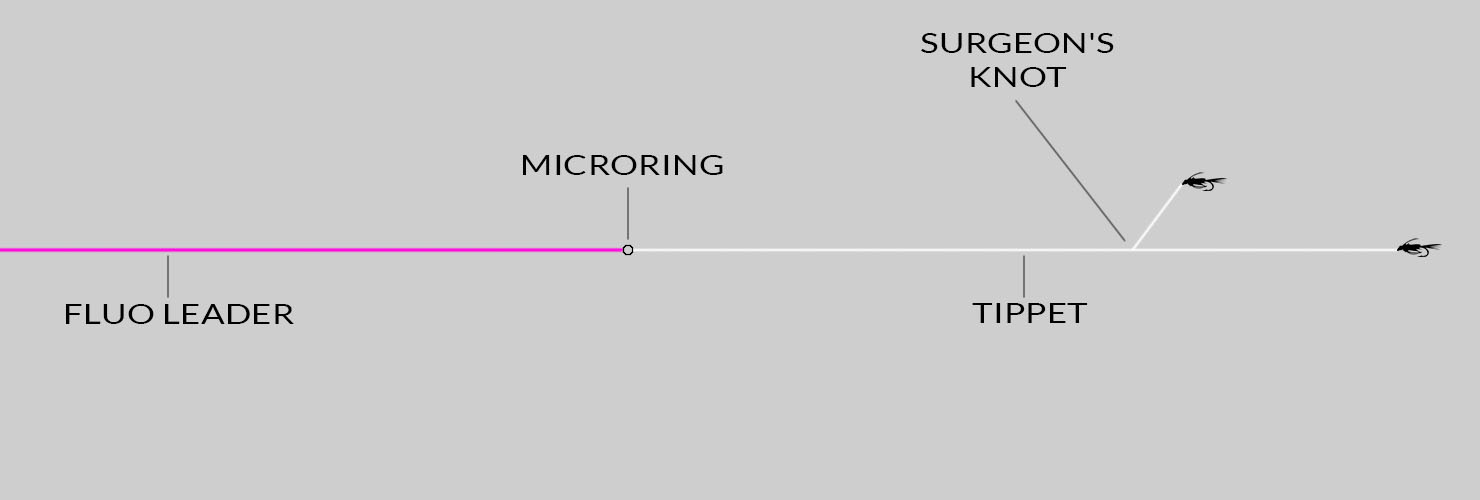
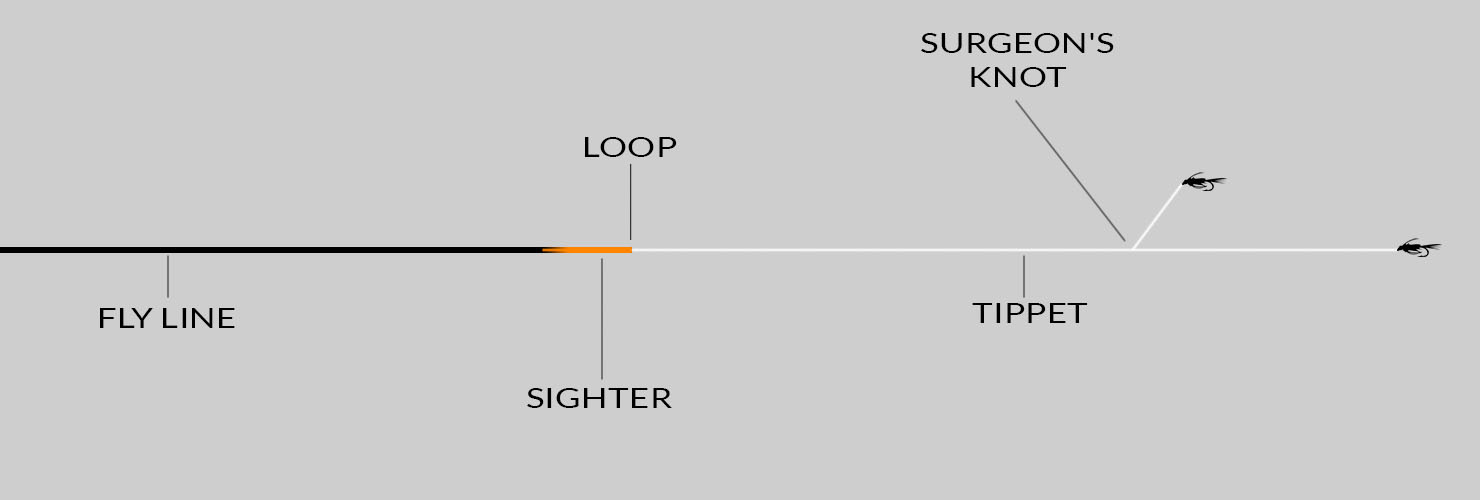
If you are fishing with an ultra-light 0.55 mm fly line with an integrated sighter or a fluorescent leader, an additional sighter is not strictly necessary as it is basically already there. All you have to do is connect the tippet and start fishing.
Modern fly lines are generally all fitted with a loop at the front line end, so you can simply connect the tippet to the fly line with a clinch knot, basically the same as you use to connect nymphs to the tippet.
Euro Nymph rig with a fluorescent leader that acts as a sighter:
Euro Nymph rig with a 0.55 mm ultra-light fly line with built-in sighter:
4.4.2. A VERSATILE EURONYMPH TIPPET
As we have seen before, the sighter is essential, because it gives you a lot of information about the drift of the nymphs and having it hidden underwater is never a good idea.
In this regard there is a very versatile rig, perhaps the most versatile, often used by competitors and professionals alike. This rig involves the use of 2 distinct sighters, so that you can fish at different depths without having to make any invasive changes to your rig. When fishing in deeper water, simply immerse the lower sighter and orientate yourself on the higher one.
One could argue that a long multicolour sighter instead of the transparent nylon strip would do the same job, but it would make it more difficult to repeat the perfect drift once you have found the exact depth the fish are standing at a given spot. With the transparent nylon strip that distinguishes much better between the two markers, this is done more quickly and effectively.
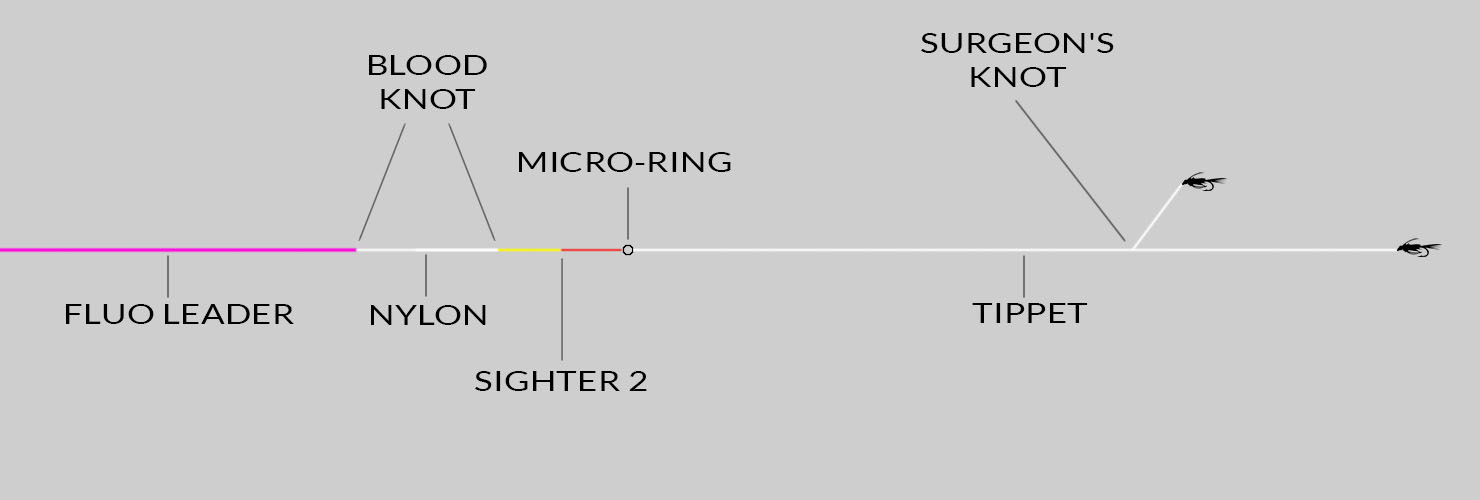
Euro Nymph rig with fluorescent leader and double sighter:
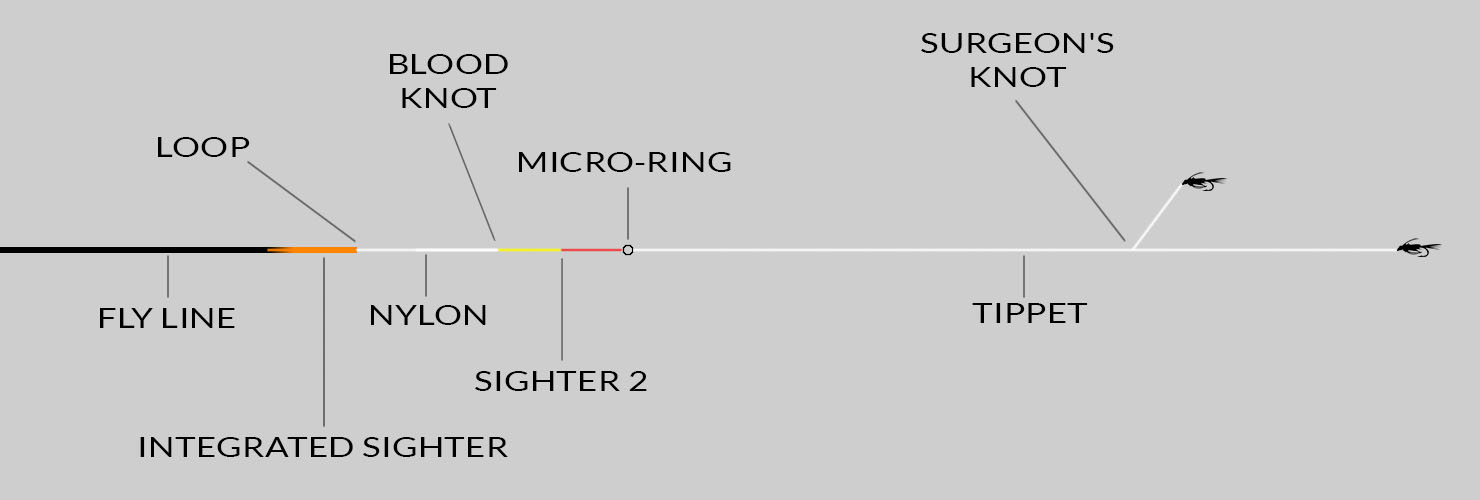
Euro Nymph rig with 0.55 mm fly line and double sighter:
In all rigs it would always be best to build them by scaling up with the breaking loads, to avoid having to lose everything at the first snag. The highest breaking load should be the leader/fly line, and then downwards for each section of line you want to add.
In our online fly-fishing shop, we have both Euro Nymph fly lines with built-in sighter and loops, as well as pre-assembled leaders, with sighter and microring, ready for fishing!
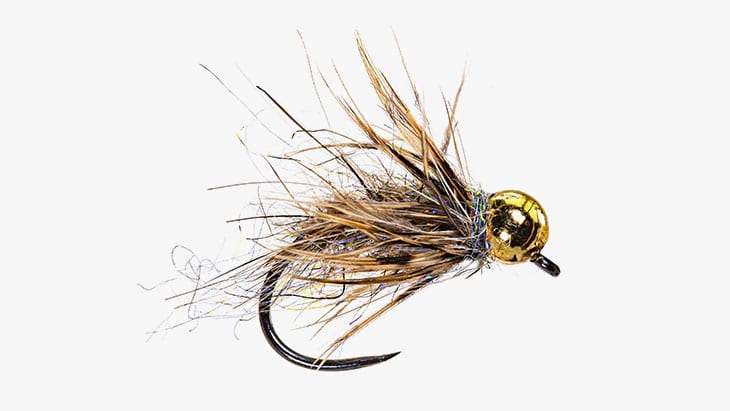
4.5. NYMPHS
The role that nymphs play in successful euro nymph fishing is of paramount importance. Not so much because of an imitative issue, but because of their weight. Indeed, through their weight you will have a decisive influence on sinking and the whole drift.
Generally, the smaller a nymph is, the more it will be able to fool the fish. The problem is that the smaller the nymph, the less it will weigh, making it impossible for it to enter the strike zone. The real challenge is therefore to make very small but heavy nymphs, and there are tungsten weights of various shapes to do this. For example, one can use Javi tungsten bodies, which weigh more than the classic tungsten bead for the same diameter, or one can add lead wire wraps under the body dressing. The type of dressing also has an impact on the sinking of the nymphs. In fact, dubbing, CDC and various feathers create friction within the water and slow down the sinking of the nymphs, while smoother and more compact dressings, such as perdigones, tend to sink faster.

Either one or two nymphs can be rigged on the tippet; the choice is dictated by the regulations of the fishing waters and your technical requirements. It will hardly be legal in running waters to use more than two nymphs. As a general rule, where permitted, it is advisable to fish with two nymphs, in order to have a better chance of catching fish and because varying weights and distances between the two flies can lead to completely different approaches.
Using only one fly can be useful in small environments with shallow water, or where you need a lot of precision. Beyond these borderline cases, the use of two nymphs is almost always more suitable.
In most situations, the heavier nymph is tied at the point tip, because the heavier weight placed at the end of the tippet contributes to its streching. As we have already seen, a stretched-out tippet allows you to instantly perceive everything that is going on underwater, enabling you to respond with lightning-fast strikes to every take. In addition, the heavier weight at the front helps to stretch the tippet even while casting, minimising the possibility of annoying tangles.
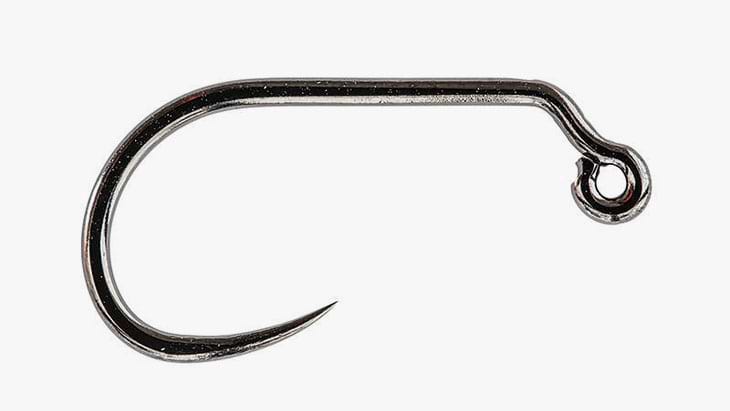
4.5.1. JIG NYMPHS AND JIG OFFS
There are special hooks and tungsten weights that are able to keep the nymph with the hook pointing upwards throughout the fishing action. This is really very useful when with flies you are often in contact with the bottom, because you will be able to preserve the sharpness of the hook tip and minimise the possibility of snagging.
Jig hooks, i.e., those hooks with the eye offset from the axis of the hook shank, should be combined with slotted tungsten beads. Their weight distribution rotates the hook, keeping its tip pointing upwards.
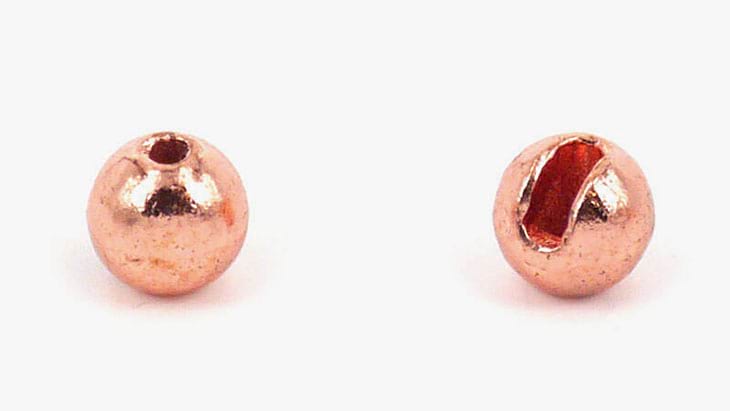
If you want to apply the same principles on a standard hook, you can put a tungsten jig off bead, which, thanks to its off-centre hole, also distributes the weights in such a way that the hook rotates with its point upwards during the fishing action.
4.5.2. THE DISTANCE BETWEEN NYMPHS
The standard distance between nymphs varies from 30 to 50 cm, allowing you to fish in the water column at two different depths at the same time; however, this distance can be altered to have completely different approaches. Let's look at a few examples.
Example 1
You could shorten the distance between the two nymphs to increase their sink rate without having to increase the weight of the flies, so you will have both nymphs at the same depth. An interesting choice in very cold periods, when all the fish are stuck to the bottom.
Example 2
You could tie a nymph at the tip and an emerger on a very long line, this will allow you to have one fly on the bottom and one a few tens of centimetres below the surface. On certain occasions this could prove to be the winning strategy, although sensing a take on the emerger will be a little more complex due to the slack dropper.
Example 3
The most classic and widely used strategy, two nymphs 20/50 cm apart with the heavier one tied at the tip. This allows you to fish at different depths while maintaining excellent contact with both flies.
The most important aspects are the size and weight of the nymphs, which will determine the depth and speed of the drift itself. This matters more than anything else, even more than the type of dressing you are using. An 'ugly' nymph passed in the right place and the right way is much more effective than a 'nice' nymph passed in the wrong place and the wrong way. Therefore, it is more important to have nymphs of different weights in your fly box than different types of dressing.
5. CASTING
When Euro Nymphing you can fish either with monofilament or with a 0.55 mm ultra-light fly line. As long as you fish a short distance, say within 10 metres or so, casting is quite easy whichever line type you choose. Obviously, things get complicated when you want to reach large distances with the 0.55 mm fly line, in which case a little more experience in traditional old-school casting is required. As far as fishing with mono line is concerned, regardless of the distance, making false casts is never helpful.
You will probably fish within 10 metres in most cases, and in this case, even if you are fishing with an ultra-light fly line, no false cast is required to reach the spot, but a single casting stroke will suffice to get the flies in position. To do this, you only need to rely on the weight of the nymphs if you are fishing with a mono or use both the weight of the nymphs and the fly line if you are using a 0.55mm fly line.
When Euro Nymphing, reaching a decent level of fishing does not take much time and if you apply yourself correctly you can start catching your first fish right away.
In the following lines I will try to describe the standard Euro Nymph cast, i.e., the series of movements that you will find yourself doing very often when fishing and which your muscles will memory over time. In doing so, always consider that the hand holding the rod is the right hand.
In order to cast your nymphs, you need to take enough mono line or fly line out of the reel to reach the desired distance. At that point, you take the whole tippet and a piece of leader line out of the tip guide and with your left hand you hold the mono or fly line so that it does not run between the running guides.
Now, with a decisive move, bring the tip of the rod behind you without exaggerating, let's say up to 13 o'clock at the latest. As soon as the line or tail extends behind you, with a firm forward lash cast the nymphs onto the chosen spot. Immediately after the cast, let go of the line or fly line you were holding in your left hand and slide it through the running guides.
In itself the casting is finished, but now a series of actions must be performed quickly to prepare the nymphs for the next stage. Learning to make the right moves immediately after the cast is crucial to setting up a correct drift, in fact, a poorly managed drift in the early stages will be difficult to recover and the throw will have to be repeated. The things you need to do are few and simple, and they are basically the same whether you fish with a mono line or an ultra-light fly line.
In the next chapter on drift management, we will delve into all the steps you need to take to be as effective as possible.
In the following video we see a series of casts that leads to the catch of a small trout.
6. PROPER DRIFT
Wild trout and grayling are very attentive to how an insect is carried by the current. A nymph that is faster or slower than the natural flow of the water generates mistrust in fish, especially the more suspicious ones, and the larger and wilder a trout is, the more pronounced this attention to detail is. To be able to fool certain fish, it is necessary to make your nymphs flow not only at the right depth, but also at the same speed as the current.
When fishing in slow water, this is amplified by the fact that the fish have plenty of time to observe your nymphs and assess whether they may be a free meal or a scam, in which case the drift of the flies must be practically perfect. Conversely, in fast water, the fish has very little time to decide whether to eat your nymph or let it get away with a meal and this gives you a higher margin of error in the execution of the drift.
6.1. THE SPEED OF THE CURRENT
In order to drift nymphs correctly, you must first understand how the current throughout the water column is formed. Its speed, in fact, is not the same at all depths, because compared to the surface the current will tend to become slower and slower as you approach the river bottom.
For this reason, if you look at your sighter and notice that it is drifting at the same speed as the surface current, the flies are most likely being dragged at a faster speed than the current at the bottom. Fishing this way, I am not saying it is impossible to catch fish, someone will always fall for it, but if you want to take your technique to the next level and be able to catch wary fish in difficult situations, this is something you cannot underestimate. Ideally, the sighter should drift at a lower speed than the surface current.
In an ideal hypothetical drift, the tippet should drift naturally, at a slightly slower speed than the surface current. The sighter helps you to understand what the speed of the leader is in relation to the surface current and to speed up or slow down the drift you must vary the weight of the nymphs.
6.2. THE RIGHT WEIGHT OF THE NYMPHS
Let's look at the 3 references you have to understand the effectiveness of the drift you are making and how to make the right adjustments.
You are too heavy if the sighter tenses up quickly and flows much slower than the surface current. In this case you will also have the problem that the flies will keep getting stuck on the bottom. The advice here is to lighten the weight of the flies.
You are too light if the beacon never tenses up, which means that the nymphs cannot reach the bottom and are floating randomly in mid-water. You might even have a take in this situation, but you will hardly be able to perceive it. Alternatively, you are too light if the sighter tenses up but flows at the same speed as the surface current, because this means that the nymphs are drifting faster than the speed of the current on the bottom. In the latter case you have to be very careful, because the difference between a good drift and a perfect drift is minimal. In both these cases you will have to increase the weight of your nymphs.
You are perfect if the beacon tenses up and drifts slightly slower than the surface current without the nymphs getting stuck on the bottom. Of course, the type of bottom also plays an important role and in a hypothetical perfect drift it is not impossible to often find yourself with nymphs stuck to the bottom. In some cases, stones and logs are as if they have hands, grabbing everything that passes in front of them. In this case try tying a nymph jig at the tip end if you haven't already done so and don't get demoralised, keep doing things right and you will see that the catches will come.
6.3. THE 3 PHASES OF THE DRIFT
The drift in Euro Nymphing consists of 3 phases: sinking, strike zone and final phase. Generally, you cast the nymphs upstream and let them sink. Before you find them in front of you, they should have already reached the bottom and ideally remain there as long as possible. As you move downstream, the point will come where you will no longer be able to follow the drift of the nymphs with the rod tip. At this point, you will have to hold the nymphs against the current and they will automatically break away from the bottom to reach the surface being drifted bay the current to your bank side.
In each of these phases a fish can be caught, although the best phase is definitely the middle one followed by the final one. In the first phase it is not impossible to catch a fish, but it is certainly very difficult to perceive the take as the tippet will be very loose in this situation.
Before you start casting, you should decide where you think there are most likely to be fish and then cast upstream from this point. In this way, once the nymphs reach the strike zone, they will already be in position in the best possible way.
6.3.1. FIRST PHASE: SINKING
In this phase you need to give the nymphs time to sink, and you should ensure that the flies are on the bottom a few moments before entering the strike zone.
Just to better understand the explanation of the various steps, again let's pretend that the hand holding the rod is the right one.
Immediately after casting, at the exact instant the nymphs hit the water, the very first thing to do is to pick up the excess line with your left hand and quickly pass it between the fingers of your right hand. At this point you should find yourself with rod and line firmly in your right hand and your left hand free. Now immediately raise the rod to lift the excess line out of the water, leaving only the strictly necessary part of the tippet submerged. With your free left hand, you must immediately grab the line dangling from your right hand and quickly retrieve it with firm strokes to bring everything under tension, thus making direct contact with the nymphs.
These operations must be performed in sequence and very quickly, also and above all to prevent the line and leader from resting on the water. If you rest the line and leader in the water you run into several problems, which would lead to you never starting properly the fishing action and having to repeat the cast. Having the line in the water would slow down the sinking of the nymphs, cause them to dredge, pull them out of the striking zone, and you would never have the tippet stretched to be able to feel the takes.
The less line you can keep in the water, the more accurate you will be. This is the reason why Czech Nymph fishing is so effective, because by fishing directly under the rod tip, the section of line submerged in the water is as small as possible. This reduces dredging to virtually zero, giving you maximum accuracy and extremely direct nymph contact. Clearly, if you fish further out it is inevitable that the line will enter the water transversely, forcing you to dip more line to reach the bottom, but always bear in mind that the less line you have in the water the more effective you will be.
In the short clip below, even though the fishing action was ruined by a particularly annoying wind, you can see all the steps described above very well. All the movements are performed very quickly and may seem a bit complicated at first, but after a very short time you will automate everything and be able to perform all the steps without even thinking about it.
If you are quick and can keep line and leader out of the water, the flies will sink very quickly, exactly in the chosen current vein, reaching the bottom in the right time and with minimal drag. The tippet will stretch completely before entering the strike zone and you will be able to perceive everything going on underwater, reacting to the most subtle takes with lightning-fast strike.
A mistake to avoid
A classic mistake that is made at this stage is to lift the rod too high or retrieve the line too much after the cast, because you are trying to remove the excess line for the reasons mentioned above. Do it, but do not overdo it, otherwise you will pull the nymphs out of the striking zone. You have to be quick but gentle in this operation, leaving some leeway at the tension of the tippet.
Remember when we said that you have to pass the line from your left hand to your right and then end up with rod and line on the same hand? This is because the distance between the rod handle and the guide ring is quite large and it would make all operations really complicated, if not impossible, to use the first ring of the rod as a pivot on which to then slide the line during the retrieve. By grasping the line with the right hand and then lowering this pivot onto the rod handle, the whole process will be much easier.
A useful accessory
To solve this problem, the Spanish company Luckybur has developed an extra running guide that can be easily attached and removed on any rod. In this way you can have an extra guide ring right above the handle to make it easier for you to catch the line during the various stages of fishing and not just when casting.
6.3.2. PHASE TWO: STRIKE ZONE
This is the hot zone and is where you will make most of your catches. In the strike zone the line will undergo very little dragging and this is when you will have excellent contact with the nymphs.
If you have done things correctly during the sinking phase, you will enter the strike zone with the tippet fully extended and the nymphs in position on the bottom. To recognise if the tippet is fully extended you must always observe the sighter. You will be officially into fishing at the exact moment when the sighter goes from being slack to being taut. At this point, if you have set the right nymph weight, the tippet will practically flow by itself all along the strike zone, and you will only have to follow it with the rod tip all the way down. In this situation you must try to slightly precede the sighter with the rod tip, but never exaggerate because you risk dragging the nymphs and ruining the drift.
It may happen that the tippet stopps because the nymphs get snagged. In this case, as long as you have not run aground irretrievably, it will be enough to give light taps with the rod from the bottom upwards to try to free the nymphs and get them back on their way.
6.3.3. THIRD PHASE: FINAL PHASE
The final phase is by no means to be underestimated. It will certainly never be as profitable as the strike zone, but it could give you a lot of satisfaction at certain times.
Once the drift in the strike zone is completed, the nymphs will have reached the end of their course and blocked by the line, will have no choice but to raise from the bottom and reach the surface. This movement mimics emerging insects very well, as they basically follow the same path. It is therefore better not to be in a hurry to make another cast, the ideal is to let the nymphs drift calmly off the bottom, giving them time to reach the surface naturally. When you are at the end of the drift, lower the rod onto the water and wait a few seconds, holding the nymphs against the current. You could also raise and lower the rod 2 or 3 times to animate the nymphs a little and if nothing happens proceed with the next cast, repeating everything from the first stage.
In the following short video clip, we will see two catches made during this phase:
7. CONCLUSION
A thousand other aspects could have been explored in depth, especially on casting in certain situations, drift management in particular conditions, and much more.
I believe, however, that we have already put a lot of meat on the fire and all in all an angler approaching Euro Nymphing for the first time can draw from this article a whole series of basic information to be able to at least start fishing.